
How to make Custom Text
Difficulty: 2/10
Look at this picture. And this one too. Isn't it really cool? It is. You want to learn how to make something like that. You WILL learn how to make something like that. So let's start.
First, open up Photoshop and make a new file, any (REASONABLE) size. You'll have a nice, blank canvas.
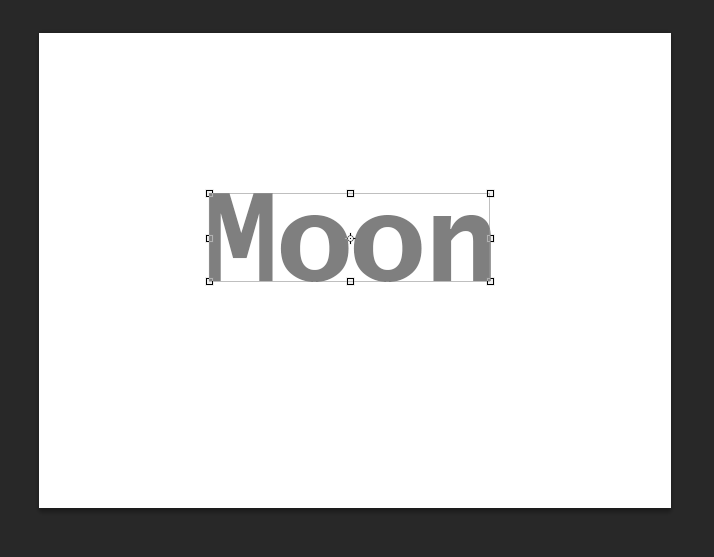
Move on over to the Text tool. It happens to look just like this:

Click it, and type what you want to type. For my example, I'll be doing the word Moon. Adjust the size to fit your blank canvas. Here is mine:
Color doesn't matter, it'll be a picture soon anyways. Then, copy and paste the image you want as the background. CTRL + C copies the image and CTRL + V pastes it. This will open the picture in a new layer. Resize the image to fit your screen. Here is what mine now looks like:
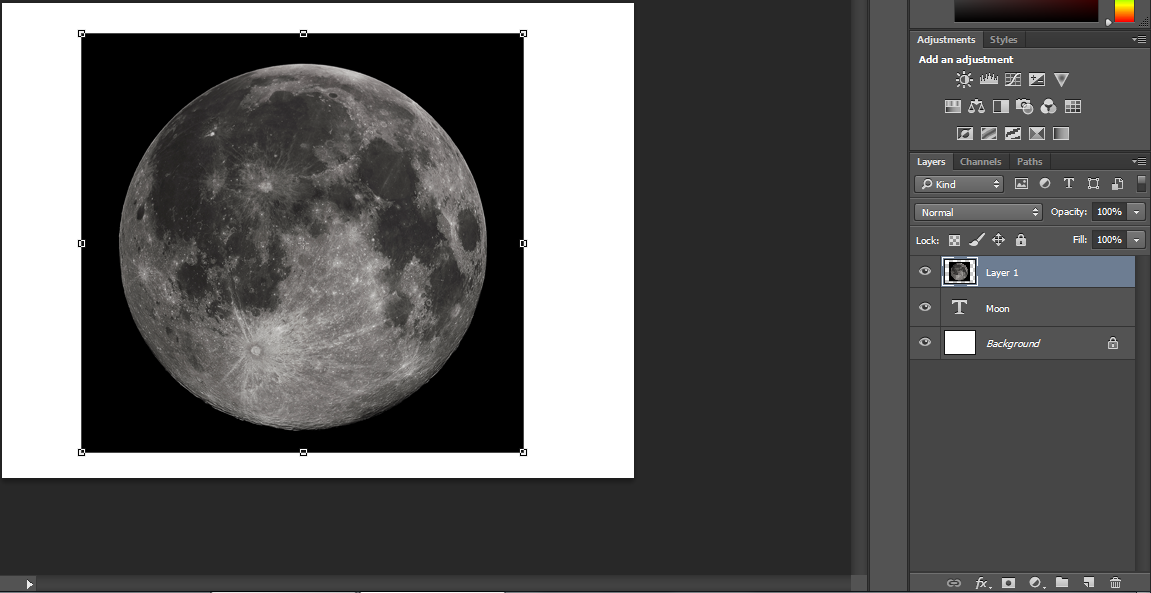
(Notice the layers.)
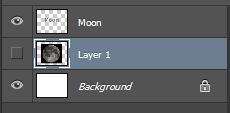
Now, drag the moon layer behind the text layer, click the eye so the image is hidden, and right click the text layer and click "Rasterize type". Your layers should now look like this:
Now, go over to the tools and click the magic wand tool. It looks like this:

Go to the top and set it to the addition setting here:

Now, click each letter (make sure you have the text layer highlighted) so they are all selected. Now, switch the the moon layer (With your selection still made). Make it visible and push CTRL + SHIFT + I and then push Delete. This will delete everything but the text. Delete the whole entire text layer. After all of that is done, you should be left with this:
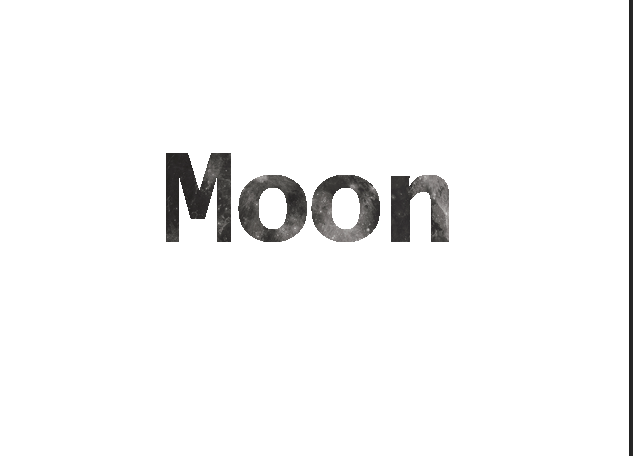
And that's it! Your desired text is now a picture also!
My tutorials are starting to be less slightly in-depth to adjust to developing skills. If you have any questions about any steps or any comments, feel free to comment!
If you have any other questions, you can follow this tutorial also!
If you have any other questions, you can follow this tutorial also!
This was really neat! The concept of having text as a picture is a creative idea. I find layers confusing sometimes, but your step-by-step instructions with pictures were helpful.
ReplyDeleteThanks Morgan!
DeleteIt's interesting to see these kind of subject. I liked the way you used double layers for a fancy text. Hope you post more advanced skills like picture revision or quality correction.
ReplyDeleteThanks Sean. I may do some more advanced tutorial in the future.
DeleteToday, I first visited your blog, and I'm so happy to find the information that I need. I've always wanted to know how to do Photoshop, and thought people who did it were so cool. I really like this post that you explain it so well that I don't have any questions! Keep up the good work, and I'm looking forward to some other nice posts!
ReplyDeleteThank you Michael, I'll keep trying to explain things well :)
DeleteWow Jesse, is this what you did on your PSA? I think I should uses those tools on mine too, thank you for such a useful information. I may need your help on my next assignments. I can't wait for some other photoshop skills.
ReplyDeleteThat's actually exactly what I did for my PSA! Thanks for the kind words!
DeleteThis comment has been removed by the author.
DeleteLooks like so many people love your blog Jesse. This Photoshop trick is awesome, and the instruction you provided is explicit and simple. I think your blog would be even better if you could show us more examples. Anyway, I like your blog.
ReplyDeleteThanks for the kind words and advice Leo!
Delete